Spraying an alloy cam cover
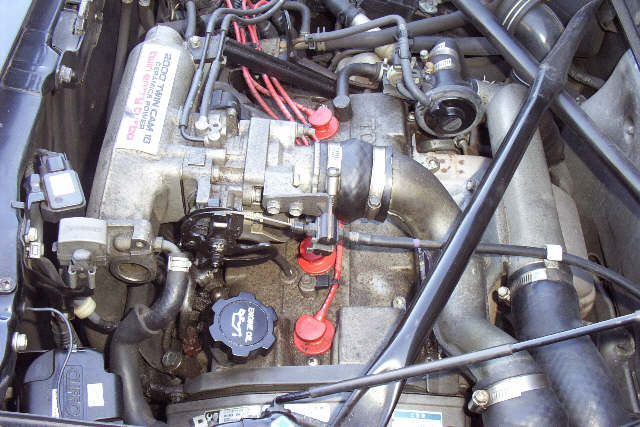
If you open your bonnet, and you are greeted by a view similar to this, then it's about time for a clean up!
Some alloys tend to oxidise over time, causing the surface to to have a rough, white powdery texture. The oxide is very absorbent, and oil spillage and general dirt will soon result in the unappealing look below. To restore the cam cover to it's former glory, or even change it's colour completely is not difficult, although access to the cam cover on the MR2 Turbo is more difficult than most.
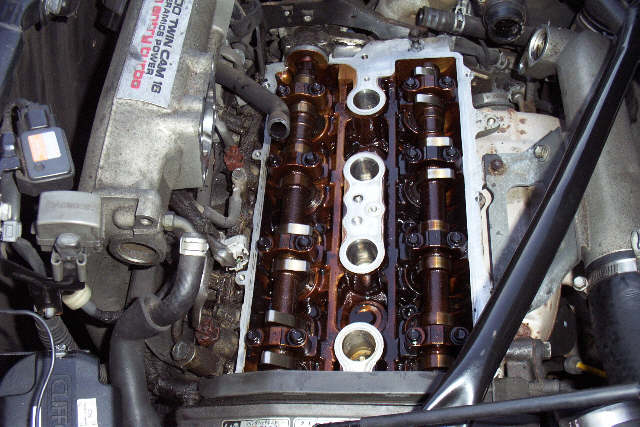
Remove the throttle cable, the left hand intercooler pipe and the throttle body. The throttle body itself is constructed of three "slices", each secured to the next by either four bolts or four studs and nuts. Remove each "slice" one at a time.
The cam cover on the MR2 Turbo is secured by numerous cross head screws. Other engines may use socket headed bolts, or even plain hex headed bolts. Be very careful when removing the cam cover that no dirt enters the engine. Whilst working on the cam cover, it's a good idea to cover the engine with a clean rag to prevent any dust and dirt entering. Also stuff a rag into the inlet manifold if you have had to remove the throttle body (unlikely on most engines).
Next job is to remove the oil and grease from the cover. A good scrub with hot soapy water works well, or an engine degreaser such as gunk could be used. If the cam cover has previously been painted or lacquered, the chances are the finish is loose and flaking. This must all be removed or the finished article will start losing paint very quickly. A combination of Nitromors or similar commercial paint stripper and wire wool or a reasonably gentle wire brush should make short work of removing virtually any type of finish.
The hard work starts when you need to remove the oxidisation and restore a smooth, unblemished finish to the metal. Start with wet and dry abrasive paper, of around 300 grit, used wet. This should remove the powdery finish fairly quickly. Some parts of the cover can be virtually impossible to reach with the wet and dry. I found a small brass wire brush worked well to remove oxide build ups in those areas. This can take a considerable amount of time, I spent a whole afternoon just using the wet and dry to achieve a really good finish.
Cleaning
Before spraying the cam cover, it must be thoroughly washed out so no traces of abrasive grit from the wet and dry paper remain. If this enters your engine, it will cause considerable damage, especially to cam lobes and followers. The surface must also be grease free to ensure the primer will adhere properly. A clean rang soaked in cellulose thinners works very well here. Do not be tempted to use white spirit or turps, it leaves a greasy residue that will cause problems later.
Spraying
What type of paint to use? Well the cam cover itself does not experience particularly high temperatures, and most types of paint will survive quite happily. However, aluminium alloy is not the easiest material to paint. The metal itself oxidises so easily that normal car body primer can start flaking off within a few weeks. The solution is to use an etch primer. The formulation of this paint means that it chemical bonds with the metal, rather than just sitting on top of it. This provides a very strong, durable finish for the top coat. Halfords sell a spray can of etch primer manufactured by UPOL, and other brands should be available from most motor factors or car body supply outlets.
Ensure any breather pipes, the hole for the oil cap and any gasket surfaces are protected by masking tape
When you spray the cover, you can either hang it up via some string or wire, or place it on some (dust free) cardboard or newspaper. The advantage of hanging it up is that the drips of paint that tend to gather in aerosols won't spoil the finish. However, runs are more likely. I sprayed mine flat. Ensure adequate ventilation and you should really be using a breathing mask; etch primer is really not good for your lungs.
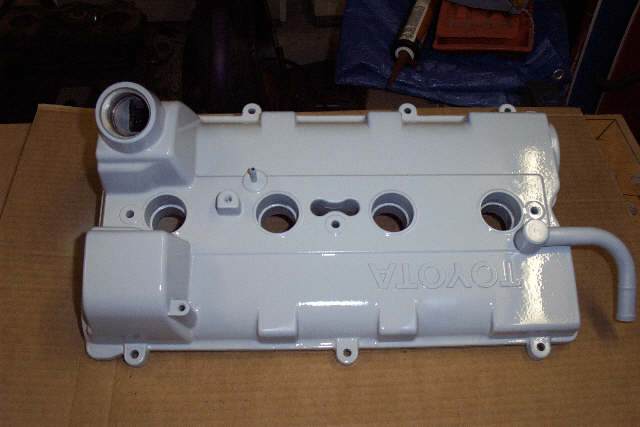
After leaving the primer to dry, it should look something like this (I have removed the masking tape in this picture):
Top coat
I used standard gloss back aerosol paint from Halfords for the top coat. As always the secret is to put many light coats on rather than one heavy coat. After for or five coats I left the paint to harden for 1/2 hour before baking the entire cam cover in my oven at around 80degrees C. This is strictly optional but ensures the paint has cured fully before re-fitting, especially if the weather is cold. Alternatively leave the cam cover around 24 hours in as warm an environment as possible. The paint will be well baked on after a few hours of the engine running anyway.
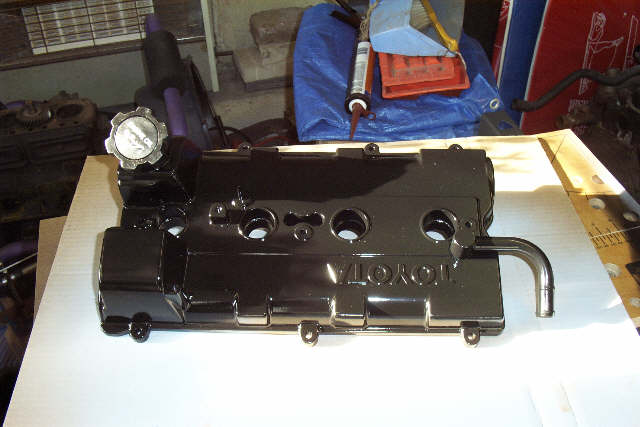
After this step, the cover should be looking something like the picture below. The reflection in this picture made the finish look somewhat grey, but it was actually a very deep glossy back.
Re-fitting
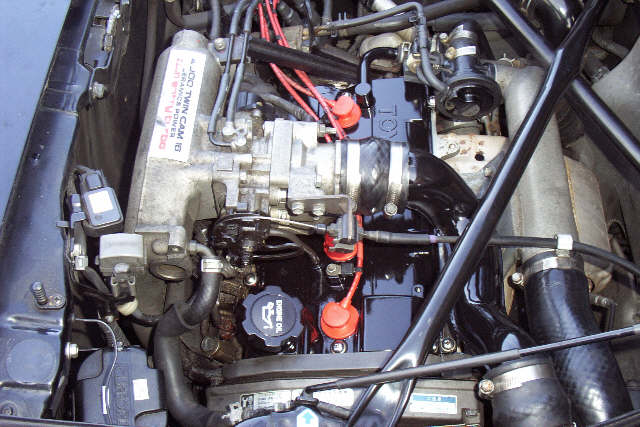
Re-assembly is the reverse of disassembly, as the Haynes manuals are fond of saying. It's always a good idea to use a new gasket, and in the case of the MR2, also the small rubber washers that seal the retaining screws. Take care not to scratch the finish of the cam cover with any tools whilst re-fitting. The picture below shows what a huge difference this has made to an otherwise grubby looking engine bay. I have also sprayed the steel intercooler pipe. However, there are lots of jobs left to get the engine bay looking really good.
19/03/2004 Mike Rigby-Jones